How (and why) I Redacted 488 PDFs Using Image Magick and Paint
While I was working as the Metadata Librarian at the NASA Goddard Library, one of the projects I tackled was providing public access to 488 issues of the Goddard News, from 1960-1999. These issues had already been digitized and turned into PDFs. However, they were only available for internal use. Almost every newsletter, particularly from the earlier years, included protected PII.
For example, a profile of one secretary included the high school from which she’d graduated, the names (and ages!) of her younger siblings, the information that they lived at home with their mother at X address, and the name of their dog. On the one hand, it’s understandable. Nobody in the 1960s could’ve been expected to manage data for an era in which the name of the street on which one grew up could be considered a liability. Circulation of the newsletter was limited to employees of the institution. But even at that time, such information certainly would’ve enabled a stalker.
We wanted to put these newsletters online, with OCR and metadata records, but without this potentially-problematic data. So, I took on the challenge of identifying what needed to be done in order to make this happen. This blog post focuses on my redaction techniques, how I used ImageMagick scripts and Paint in order to redact the newsletters in ways which could not possibly be unredacted.
The Challenges
- We did not have the original TIFFs/JPGs/anything. All we had were the PDFs, which had already been OCRd.
- I had access to Adobe Acrobat Pro, but couldn’t buy any other tools for this project.
- Redaction tools are flawed and anything which acts only as layers. The New York Times had just uploaded an improperly-redacted government document. We did not want to risk the embarrassment of having this happen to us.
- We had 488 newsletters to review and describe
The Team
The University of Maryland had recently asked if we’d be a field study location for iSchool students. We could not provide on-site access, but the Goddard News project seemed like reasonable, scoped work for people interested in metadata/digital library work/etc., as they’d be doing the same kind of work as a metadata worker. Molly Olson and Ashley M. Evans both worked on this project and their work was critical in creating newsletter metadata files and reviewing every PDF while they were describing it and flagging pages/articles which had possible PII.
Molly and Ashley’s work was invaluable in getting this project done. Their positions were an unpaid, for-credit field study. As a former Maryland iSchool student, I have very mixed feelings about the situation. I would do my best not to undertake such a project today. At the time, I had less power (contractor vs. faculty) to challenge or suggest we pay them. But having had difficulty doing my own field study at Maryland because I was working full-time, I hoped at the time that I could provide a real-life project with outcomes which they could show others and, since it was remote, which would fit in with their other commitments.
Preparing the Documents/Process
We planned to keep all the original PDFs for internal use and possible use by genealogists or others who might find the redacted information useful to their research. I copied all the PDFs which didn’t need any redaction into one directory and then copied all the PDFs which would need redaction into another. Unfortunately, well over half of the PDFs needed redaction.
After some tests, I worked out the following process:
- For each PDF, split the PDF into a BMP file per page. I chose BMPs because they’re a non-layered, high-quality format.
- Open the BMP which requires redaction on Paint.
- Use Paint to put a simple black box over text which should be redacted. Save.
- Regenerate PDFs.
- Run PDFs through Acrobat Pro OCRing.
When testing, I ensured that nothing could be detected and OCRd under the black boxes and that re-splitting the PDFs into any kind of file type wouldn’t expose any kind of data. I knew it should work. I wanted to be able to say what I’d done to confirm that it worked.
Working in ImageMagick and Bash
All of the following bash scripts should be run in the main directory used to hold the initial batch of PDFs, in which the early script will create working subdirectories. These are a combination of bash commands such as listing, looping, making directories, moving files, and substitutions along with convert commands which come from ImageMagick.
The first command moves all PDFs into subdirectories with their filenames.
for file in $(find -iname '*.pdf'); do mkdir "`echo $file | sed s/\.pdf//`"; mv $file "`echo $file | sed s/\.pdf//`";done
Explained: create a list of all files which contain “.pdf” (case-insensitive). For each filename in the list, create directory based on that filename with the “.pdf” part stripped out. Move the file into the directory which matches is name (again with .pdf stripped out). Repeat for all filenames in list.
Then we need to create the working BMPs. The second command splits each PDF into numbered BMPs, starting with filename-00.bmp. These are all still contained within each PDF’s directory.
for pdfdir in $(find -type d -mindepth 1); do cd $pdfdir; convert -density 300 $pdfdir.pdf -quality 100 $pdfdir-%02d.bmp; cd ..; done
Explained: create a list all the subdirectories. Iterate through the list and go into each directory. Use imagemagick to split the PDF into high-density(300 dpi)/quality BMP files. Return back to the main directory and repeat until you’ve iterated through the list. Note, the flag %02d adds 2 digits to the variable. If you have more than 100 pages, you’ll need to increase it.
Redacting in Paint
Using the list which Molly and Ashley had created of which pages of which PDFs needed attention, I moved through the BMPs, redacting file-by-file. Fortunately, while some newsletters needed three or four redactions, many only needed one.
When opening files in Paint, I chose the Rectangle tool from the Shapes menu. I selected the Fill option, then chose Color 1 and Color 2 to both be black.
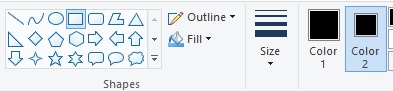
Unfortunately, Paint doesn’t have any settings I could find to make this the default selection every time I open it, so I would have to make this choice each time. Once I’d set up the tools, all I had to do was draw the black rectangle box over the text.
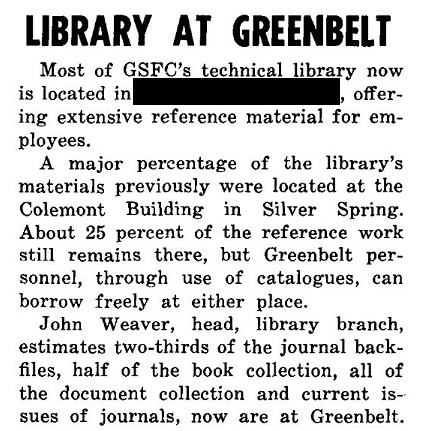
This is not an example of the kind of text we had to redact, but an example of what the end result would look like.
The process feels absurdly basic when you’re doing it. It’s also quite fast and doesn’t require any kind of fancy tooling. It was far faster than GIMP or other open image manipulation tools I tried.
Rebuilding the PDFs
Now, I had to recreate the PDFs, this time with the “-redacted” at the end of their filenames. I then moved them back to the main directory. But I didn’t do it manually, I did it all using the following bash command:
for pdfdir in $(find -type d -mindepth 1); do cd $pdfdir; convert *.bmp $pdfdir-redacted.pdf; mv $pdfdir-redacted.pdf ..; cd ..; done
You can add a -quality flag to improve quality, but I found that having done it on the way in, I didn’t need to repeat it. You might also substitute .. in mv $pdfdir-redacted.pdf .. with the full or relative path to any directory (like maybe you’ve made a ../redacted-pdfs directory). You might change “mv” to “cp” to leave a copy of the redacted PDF in its subdirectory.
OCR and Next Steps
I wish I could say that I’d used some kind of awesome open tool for OCRing, but I used Adobe Acrobat Pro, for which we already had a license. I was able to batch OCR at directory levels, setting up the files to process in the background while I did other things. Molly and Ashley had also created Dublin Core records for each PDF, including the dates and article titles. They used the NASA Thesaurus for controlled subjects to describe projects and developed their own shared taxonomy to reflect subjects not included in the NASA Thesaurus (it has not been kept fully up-to-date). I then built the repository objects manually, using the Fedora 3 desktop tool (not one of my best memories).
Overall the most onerous part of the redaction was the work which Molly and Ashley did in identifying the original issues which I needed to solve. While I hope these scripts and this process may help you if you’re also doing redaction of scanned documents and PDF creation, the process cannot be fully or nearly automated/scripted. It relies on the detailed work of those who identify and record what needs redaction.